Ironclad
Last updated: September 24, 2026
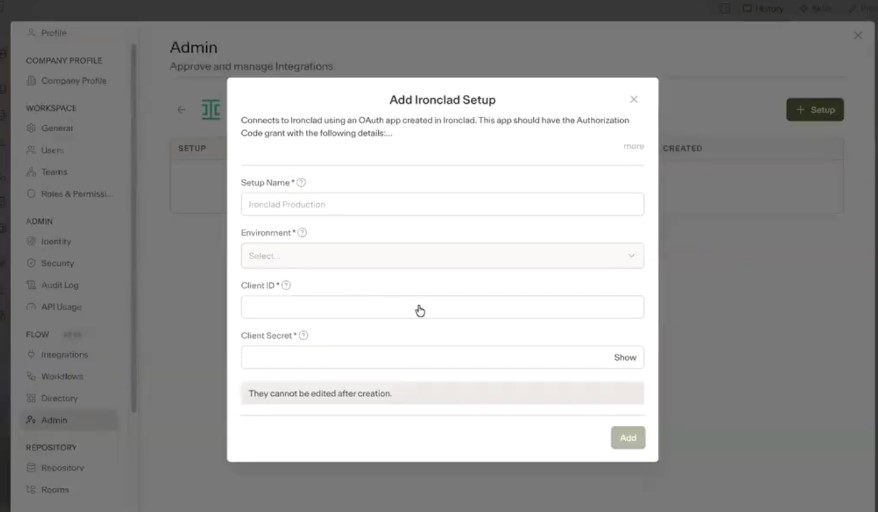
The Ironclad integration migrates agreements from your Ironclad instance directly into an Ivo room. This process mirrors other connections but includes a unique, preliminary Setup phase. During this step, you must provide credentials from a custom application generated within Ironclad. Currently, only Ironclad and LawVu require this configuration; all other tools transition immediately from approval to installation.
This initial configuration ensures that authentication details are established only once. A Flow admin completes this requirement, enabling all workspace members to perform subsequent installations using those shared settings.
Who | Responsibility |
Ivo Team | Enables Flow for the workspace, enables the integration you need for your workspace, and builds any workflow template the customer needs |
Your CLM Admin | Creates the app inside Ironclad and shares its credentials |
Your Flow Admin | Approves Ironclad and completes the Setup step in Ivo |
Any Flow User | Installs Ironclad with their own account and build workflows |
Ivo enables Ironclad for the workspace
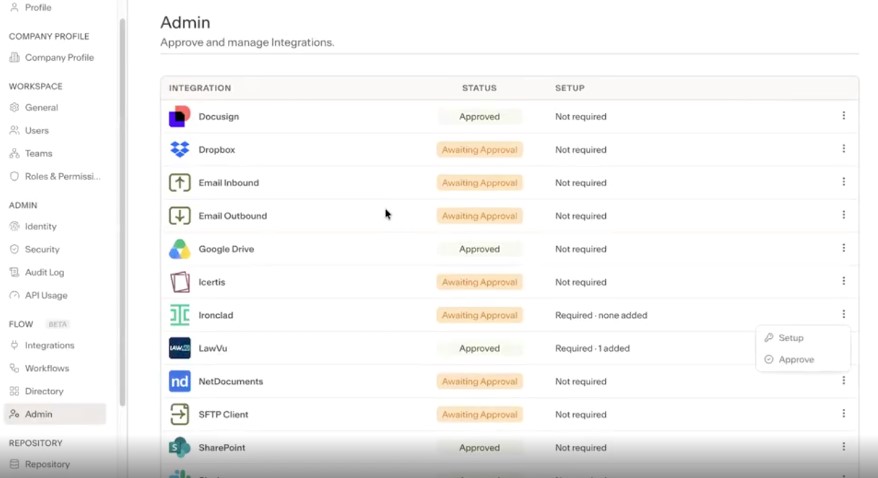
Ask the Ivo team to enable Flow and the Ironclad integration for that workspace. Once the integration is released, you will see it in the Admin panel, where you can begin the setup.
Create the app inside Ironclad
This happens in your own Ironclad account, by someone with admin rights. Ivo provides documentation covering the exact fields.
Create a new internal app in Ironclad, under API.
Add the OAuth scopes Ivo needs. They span three areas: Records, Webhooks, and Workflows (for example, “Read documents” under Workflows). Ivo’s setup screen lists the exact scopes required (screenshot 2 & 3 below for reference).
Set the redirect URL to the value shown on Ivo's Ironclad Setup screen. Copy it exactly; a mismatch is the most common reason authentication fails.
Save the app, then copy its Client ID and generate a Client Secret. Pass both to the Flow admin.
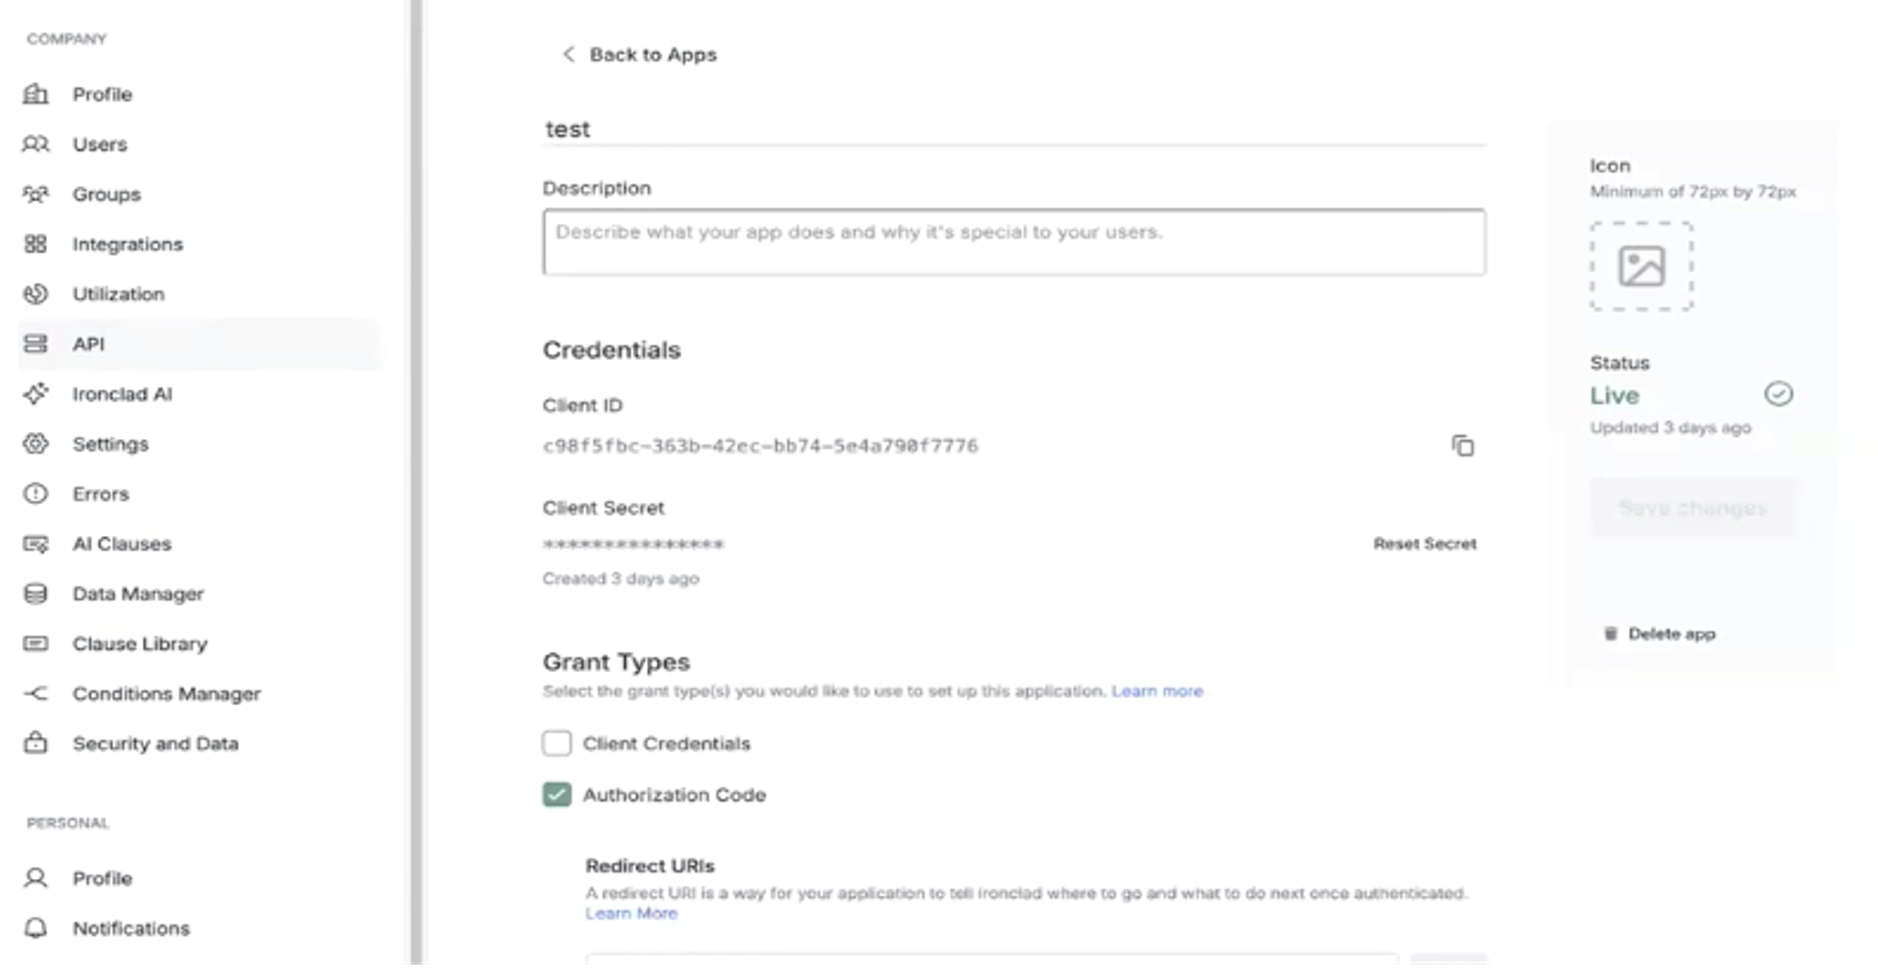
Ironclad screen to generate the Client ID
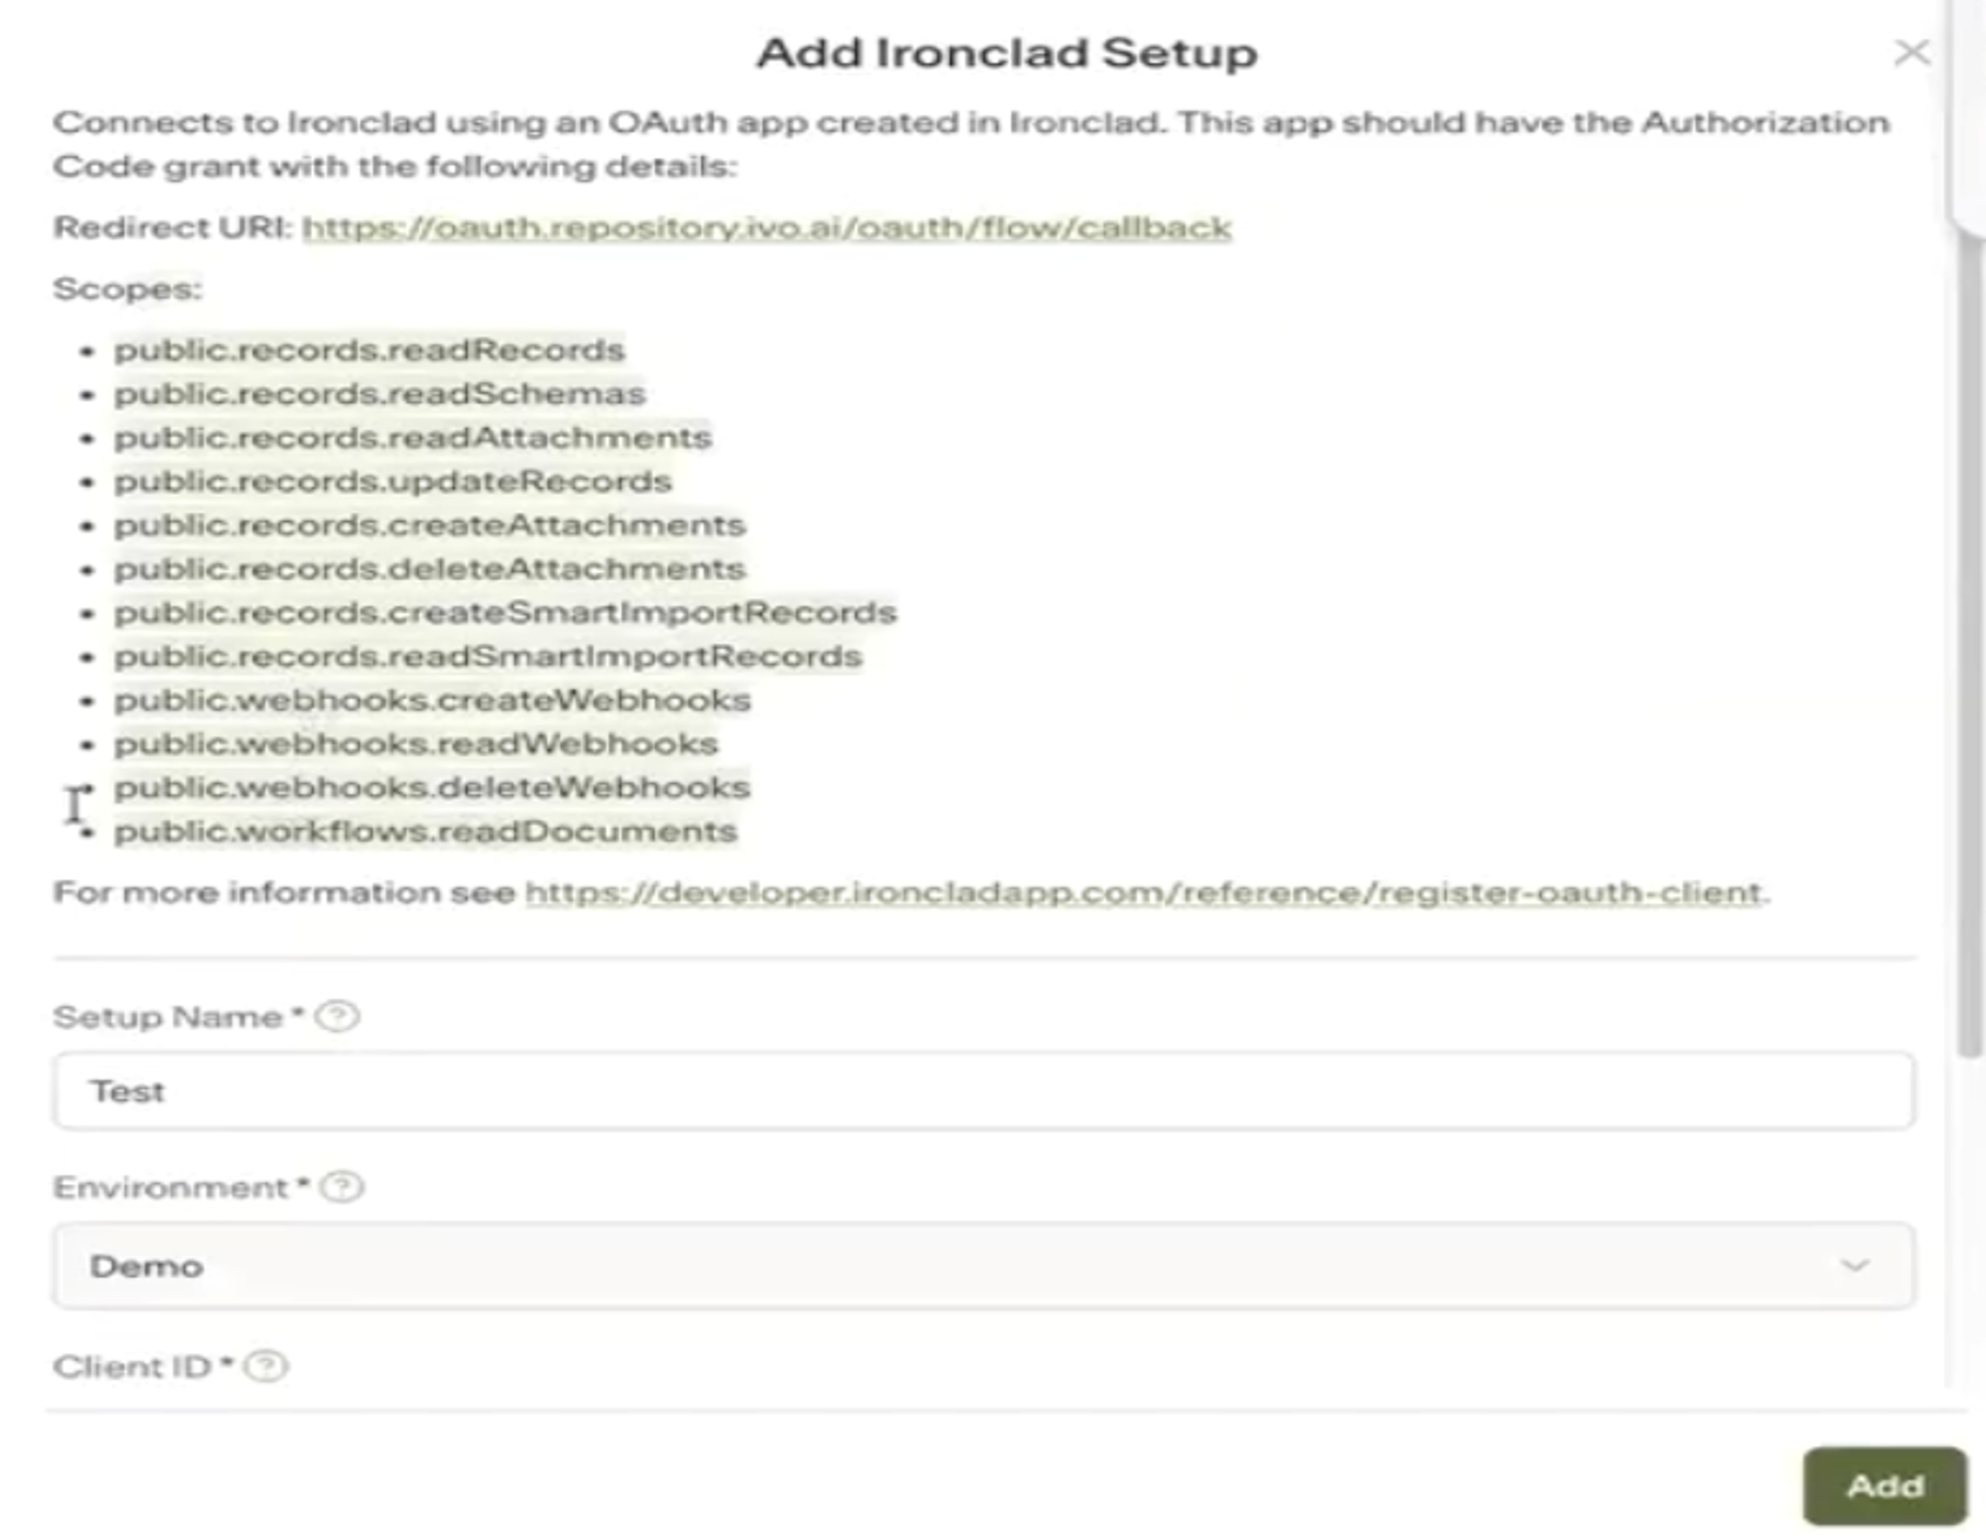
Ivo’s Ironclad Setup screen: Client ID, Client Secret, redirect URL, and the list of required scopes
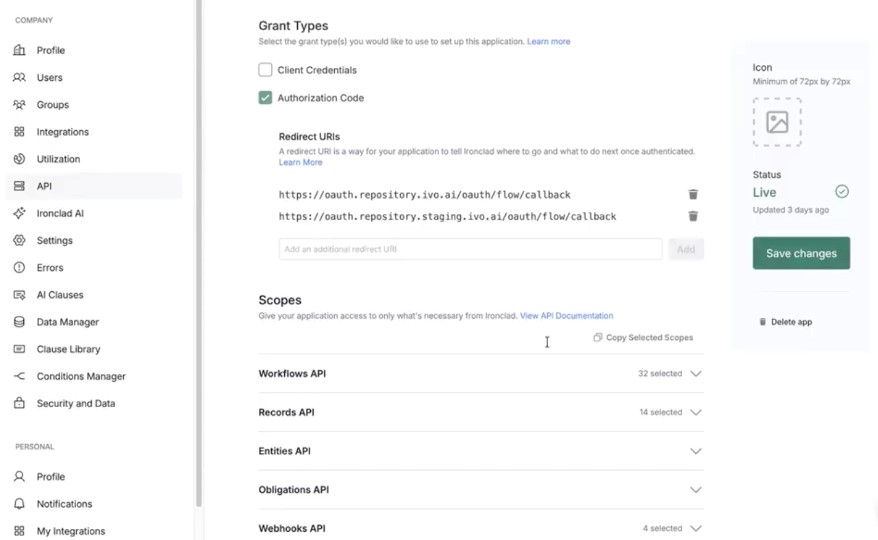
Creating an internal app in Ironclad and selecting scopes across Records, Webhooks, and Workflows (dropdowns under Scopes)
Complete the Setup step in Ivo
•In Settings > Flow, open Ironclad's Setup screen (alongside Directory and Integrations).
•Paste in the Client ID and Client Secret from the Ironclad app.
•Confirm the redirect URL and scopes shown here match what was entered in Ironclad.
•Click Save, then Add. Nothing visibly happens at this point — the credentials are simply stored for others to install against.
Approve Ironclad
•A Flow admin (Workspace Owner or Workspace Admin) goes to Settings > Flow > Admin and approves Ironclad.
•Approval is what lets Flow members install it. Admins can install before approving if they want to test it first.
•Until Ironclad is approved, members see it in the Directory with the Install button greyed out.
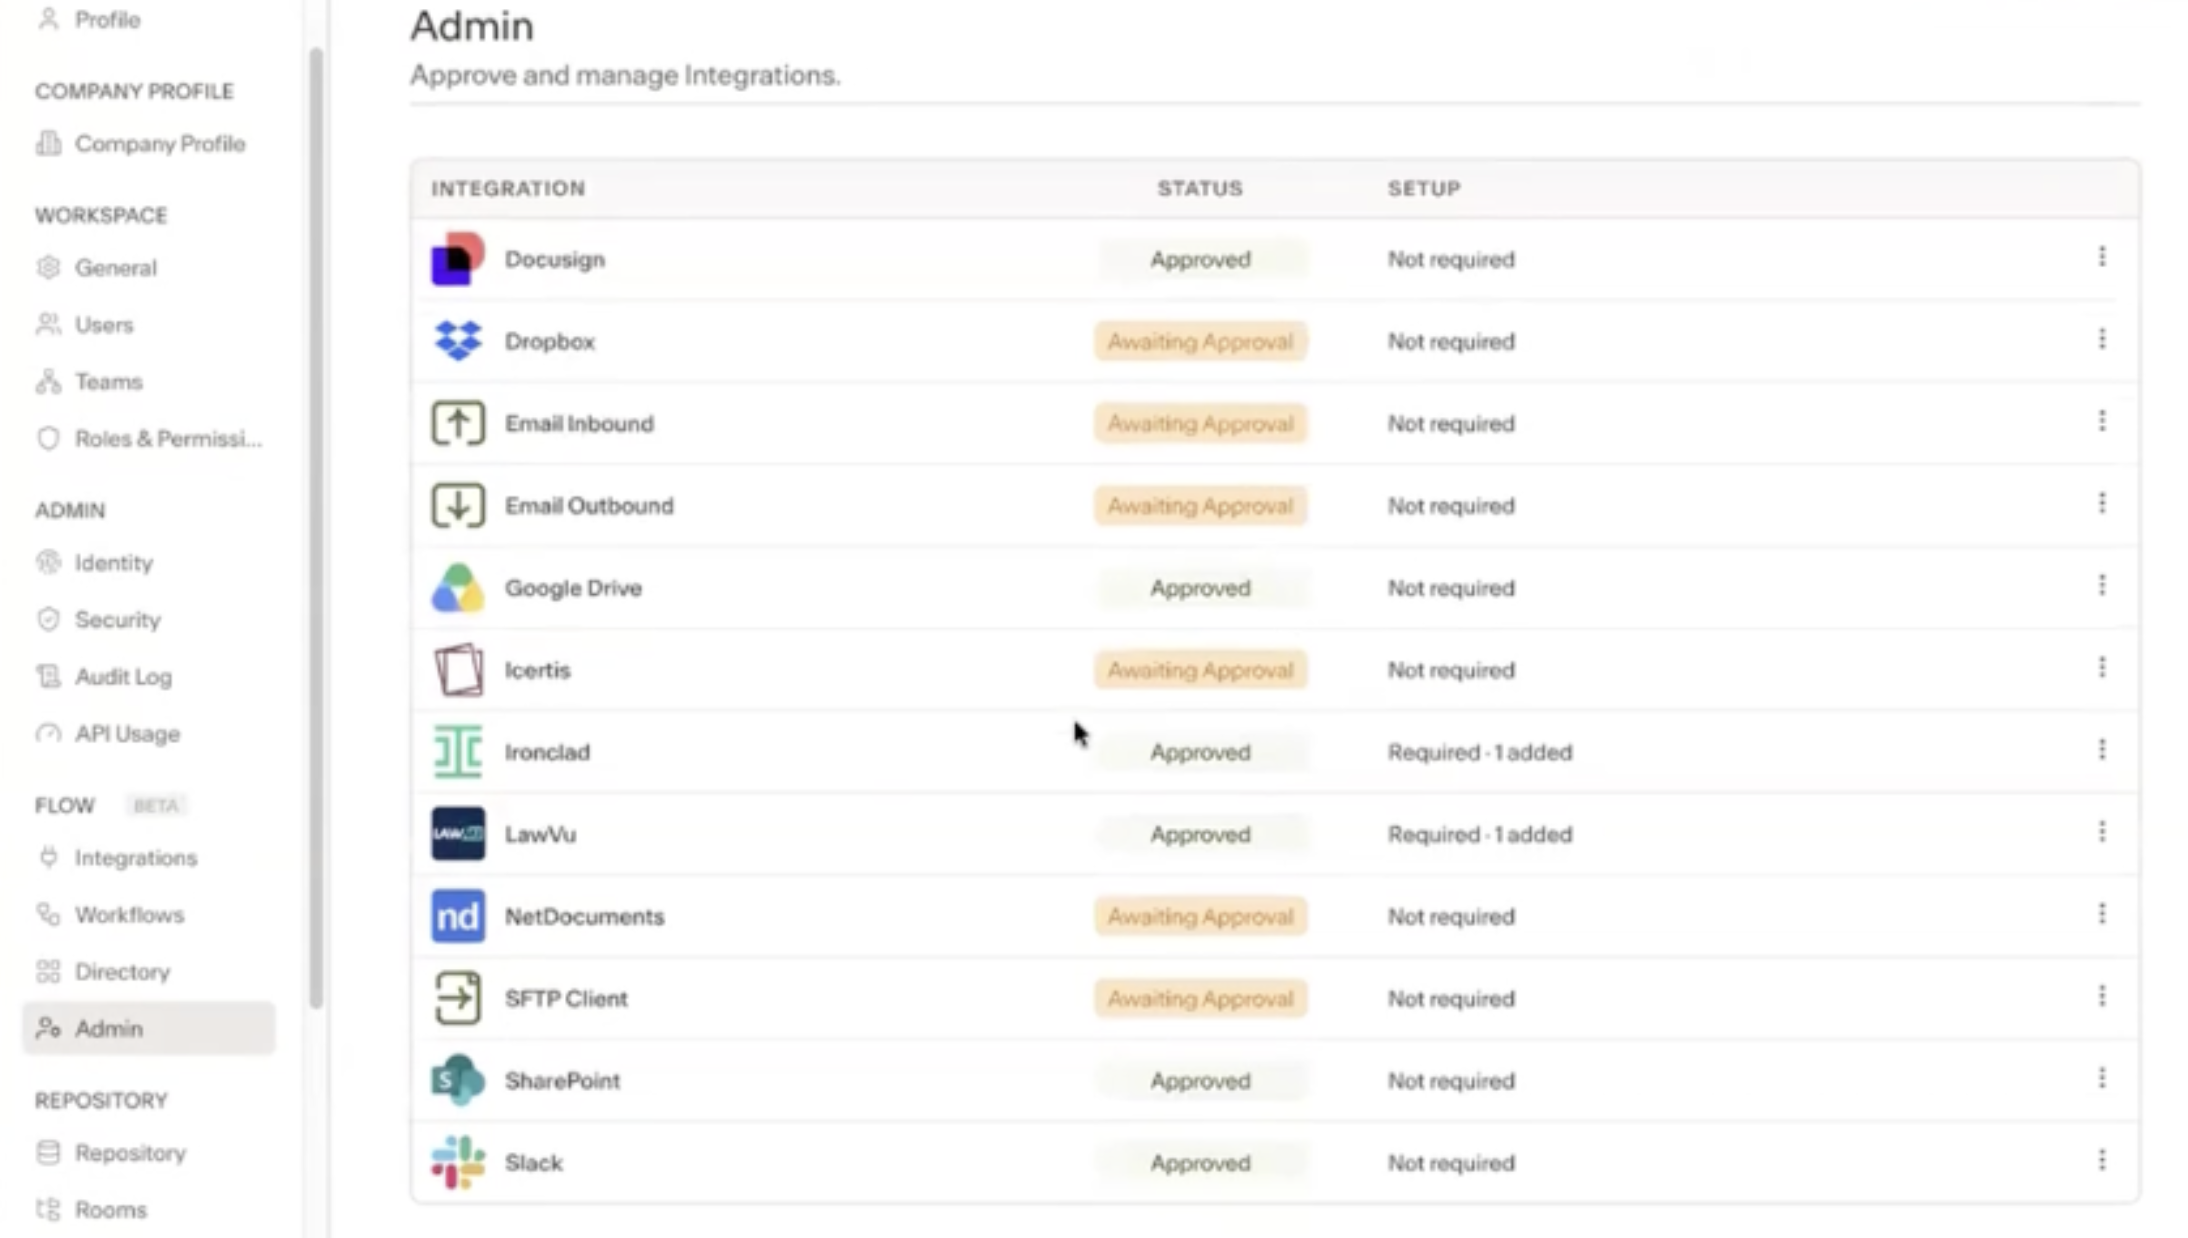
Setting > Flow > Admin, with Ironclad approved
Install Ironclad
•On the Integrations page (or from Ironclad's page in the Directory), click Install.
•Pick the credential set created in Step 3, then click Create.
•An Ironclad login window opens. Sign in with the Ironclad account you want Flow to use and authorize the connection.
•From here it behaves like any other integration: the connection starts as Personal, and can be shared workspace-wide via the ⋮ menu > Make Public.
Build a workflow
•Go to Settings > Flow > Workflows and click Create Workflow. Templates for integrations you haven't connected appear greyed out.
•Pick the Ironclad template and click Install to create your own copy.
•Set the trigger. Sync templates typically offer a recurring daily schedule plus a manual run, so you can kick off a sync on demand whenever you know new documents are ready.
•Configure the sync action, then choose where documents land: a specific room, or a routing step that filters documents to different rooms.
•If the workflow shape you need doesn't exist as a template, ask the Ivo team. Templates are built by Ivo; customers configure them rather than building new ones from scratch.
Good to Know
Ironclad currently syncs one way, from Ironclad into Ivo. Writing back to Ironclad is on the roadmap rather than ruled out; the actions largely exist, but the workflow to do it hasn’t been built yet. The Directory is the place to check what any integration can currently do.
Ironclad carries far richer metadata than cloud storage like Google Drive. That makes the routing step considerably more useful here, since filters can key off real contract metadata rather than just filenames and file types.
Flow acts with the access of the account that was connected, so make sure that account can see everything the workflow needs in Ironclad.