DNS Verification for SSO
Last updated: August 5, 2026
Ivo requires DNS verification as part of the SSO setup process. When DNS verification is enabled for your domain, users signing in with that domain will be automatically redirected to your SSO provider instead of using email and password.
How it works
When you add a domain to your Ivo workspace and verify it via DNS, Ivo links that domain to your SSO configuration. Any user signing in with a verified domain will be redirected to your identity provider to authenticate. Users on unverified domains will continue to sign in with email and password.
How to verify your domain
Navigate to Settings in the Ivo web app.
Go to Identity under your Admin settings.
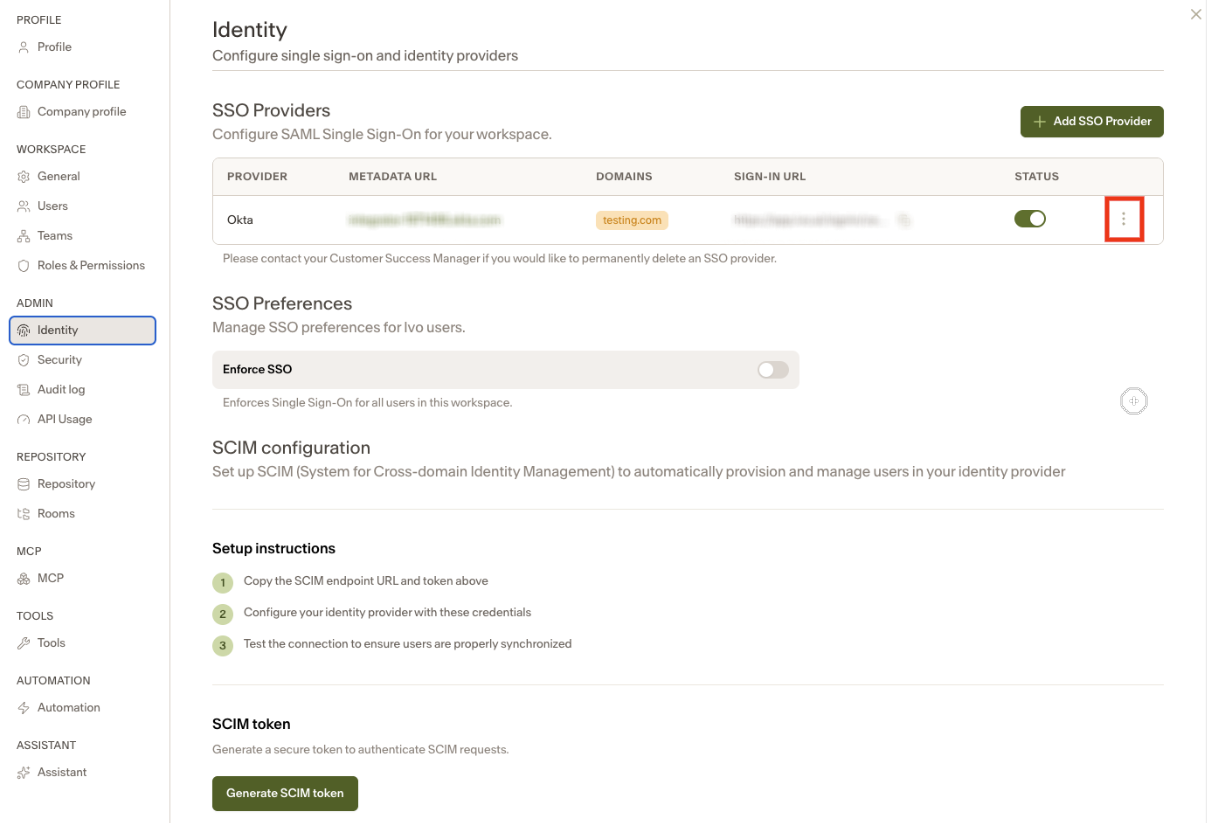
Select the three dots next to your SSO, then select Manage domains.
Ivo will provide a TXT record to add to your DNS settings.
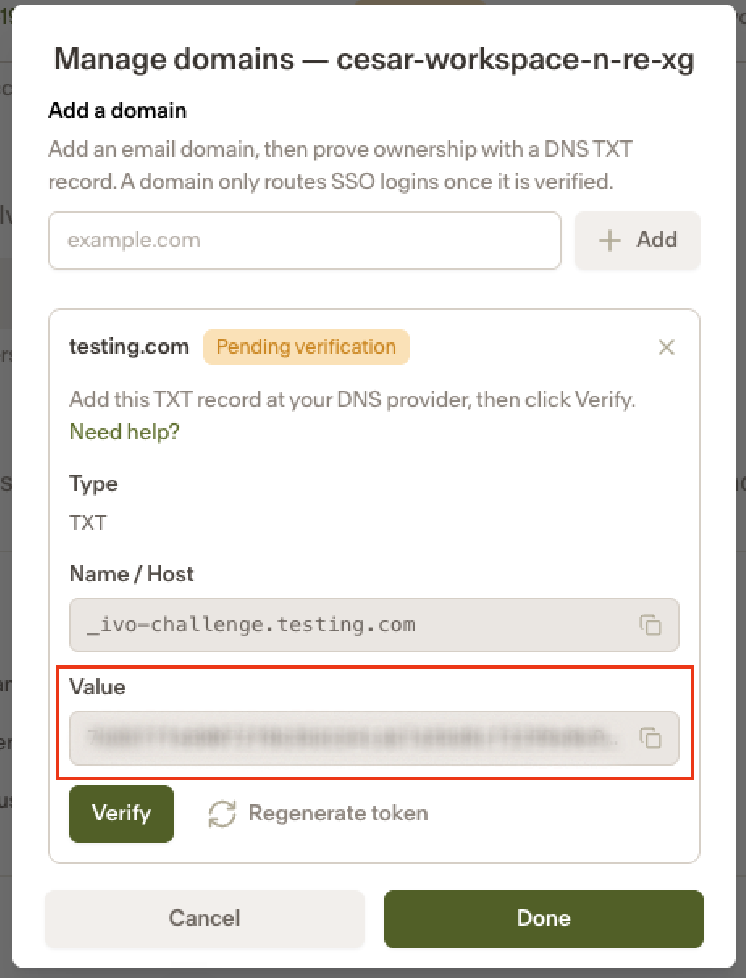
Add the TXT record in your DNS provider's management console. This must be added to your public-facing DNS zone (the authoritative records for your domain that resolve on the public internet), not an internal/private DNS zone. If your organization uses split-horizon DNS, verify the record is visible externally, for example using
digor an external DNS lookup tool, before continuing.Once the record propagates, return to the Manage domains screen and click Verify. Your domain will then show as verified in Ivo.
Users signing in with that domain will now be redirected to SSO automatically.
Notes
If a user attempts to sign in with an unverified domain, they will be prompted to use email and password instead.
DNS verification does not affect existing workspaces or users who are already signed in.
DNS propagation can take some time after adding the TXT record. If your domain does not verify immediately, wait a few minutes and try again.